Enquiry List () (0)

- Mar 26, 2026

How to Prevent Chemical Hazards in the Workplace

In workplaces where chemicals are stored, transferred, mixed or used for cleaning and maintenance, the risk of exposure isn’t limited to rare accidents. Everyday tasks can quickly turn hazardous if the right controls aren’t in place, leading to splashes, spills or unintended contact.
Preventing chemical hazards in the workplace includes understanding where risks arise, reducing the likelihood of exposure and being prepared to respond effectively if something goes wrong. The faster a hazardous substance is removed from the skin, the less severe the injury is likely to be, making prevention and emergency readiness equally important.
In this guide, you’ll learn how to identify chemical risks, apply effective control measures and ensure your site is ready to respond to spills or splashes through clear procedures and appropriate emergency equipment.
In This Guide
- What are Chemical Hazards in the Workplace?
- How to Prevent Chemical Hazards in the Workplace with a Risk Assessment System
- Emergency Readiness: How to Avoid Chemical Hazards Becoming Serious Incidents
- Conclusion
What are Chemical Hazards in the Workplace?
Chemical hazards are risks created when hazardous substances are used, handled or stored at work. Importantly, the danger doesn’t come from the chemical alone; it comes from how and where it’s used.
Chemical Hazard Types
In most workplaces, chemical hazards fall into two broad, practical categories:
1. Physical Hazards from Loss of Containment
These occur when a chemical escapes its normal container or system:
- Spills from damaged drums or containers
- Splashes during pouring, pumping or transfer
- Leaks from hoses, valves or dosing lines
- Aerosols or mists created during spraying or high-pressure cleaning
- Corrosive or Irritant Contact Hazards
These arise when chemicals come into direct contact with skin or eyes:
- Corrosive liquids used for cleaning or processing
- Irritants that cause immediate skin or eye discomfort on contact
- Concentrated chemicals that become hazardous during dilution or mixing
How Exposure Happens During Normal Work
Tasks create risk, not just the substances themselves. A sealed container in storage may present little danger, but once it’s opened, moved or transferred, the likelihood of splashes and spills increases.
Common high risk tasks include:
- Decanting chemicals from drums or intermediate bulk containers (IBCs)
- Drum changing and container replacement
- Chemical dosing lines and manual additions
- Sampling from tanks, vessels or pipework
- Cleaning operations using chemical agents
- Spill cleanup and washdown activities
Exposure to chemicals often happens when controls are bypassed or shortcuts are taken. Even low-frequency tasks can present high risk if they involve open systems or manual handling.
Common causes of chemical incidents include:
- Unlabelled or poorly labelled containers
- Incompatible chemicals stored together
- Inadequate ventilation during use
- Rushed transfers or improvised equipment
- Lack of clear procedures for non-routine tasks
These issues often develop gradually, which is why regular review of processes is essential.
Prevent Injury Severity
The primary aim of managing chemical hazards is twofold:
- Prevention: reducing the likelihood that a spill, splash or release occurs in the first place.
- Mitigation: reducing the severity of injury if exposure does happen.
While effective controls lower the chance of an incident, no workplace can eliminate risk entirely. When a chemical splash occurs, rapid decontamination is critical. The quicker a substance is washed from the skin or eyes, the less severe a chemical burn is likely to be.
This is why emergency preparedness (clear procedures, trained staff and accessible emergency safety equipment) plays a vital role alongside preventive measures.
How to Prevent Chemical Hazards in the Workplace with a Risk Assessment System
One of the most effective ways to prevent chemical hazards in the workplace is to use a clear, repeatable risk assessment system. Rather than treating chemical safety as a one-off exercise, this approach helps you identify risks, apply the right controls and keep them effective as work activities change.
Step 1: Build (and Maintain) a Chemical Inventory
If you don’t know which chemicals are on site, where they are used or who is responsible for them, it’s impossible to manage the risk effectively.
A practical chemical inventory should reflect the reality of your site, including:
- Multiple work areas or departments
- Temporary storage locations
- Chemicals brought in by contractors or maintenance teams
- Products used infrequently but still capable of causing harm
The inventory doesn’t need to be complex, but it does need to be accurate and kept up to date.
A simple chemical inventory template includes:
- Chemical name
- Location (area, room or process)
- Task or activity (e.g. cleaning, dosing, maintenance)
- Typical quantity on site
- Safety Data Sheet (SDS) link or reference
- Responsible owner or department
Step 2: Use SDS and Labels to Identify Hazards Correctly
Safety Data Sheets and container labels are the starting point for understanding chemical hazards. They provide essential information on:
- The nature of the chemical hazard
- Handling and storage requirements
- Incompatibilities
- Immediate response actions following a spill or splash
However, it’s important to recognise that an SDS is not a risk assessment.
An SDS explains the properties and hazards of a substance in general. A risk assessment considers how that substance is actually used on your site, including the task, environment, frequency of use and existing controls. Two workplaces using the same chemical can have different risk levels depending on how and where it’s handled.
Step 3: Assess Tasks, Exposure Routes and Who is at Risk
To deal effectively with chemical hazards, the assessment must focus on tasks, not just substances. For each activity, consider:
- Frequency and duration of the task
- Exposure routes (e.g. skin contact, eye contact)
- Who could be exposed, including nearby workers or cleaners
- Current controls already in place
- What additional controls are needed to reduce risk
Examples of task-based assessment:
- Cleaning operations: risk of splashes during dilution, spraying or wipe down; consider closed dispensing, clear procedures and emergency equipment nearby.
- Chemical transfer: risks of leaks or splashes when decanting or connecting hoses; assess transfer methods, connection integrity and positioning of emergency controls.
- Maintenance work: non-routine exposure when systems are opened or drained; consider isolation procedures, supervision and readiness for accidental contact.
Step 4: Document, Review and Update
A risk assessment only works if it reflects what’s happening on the ground. It should be reviewed whenever there is:
- A new chemical introduced
- A change in process or task
- An incident or near miss
- A change in layout, storage or equipment
To improve usability, many sites create a one-page summary that highlights:
- The task and main risks
- Key controls to follow
- Emergency actions to take in the event of a spill or splash
This keeps chemical safety practical and visible, rather than buried in lengthy documents.
How to Reduce Chemical Hazards Risk Using the Hierarchy of Controls
To effectively reduce the risk of chemical hazards, controls should be selected in a structured way. The hierarchy of controls prioritises measures that remove or isolate the hazard before relying on people or personal equipment. Using this approach helps ensure risks are reduced as far as reasonably possible.
1. Start at the Top: Eliminate and Substitute
The most effective way to reduce chemical hazards is to remove the hazard altogether. Where elimination isn’t possible, substitution should be considered before any other control.
Elimination and substitution in practice:
- Removing a chemical cleaning step entirely through process redesign
- Using a lower concentration of a chemical where full strength isn’t necessary
- Switching from powders to pellets or liquids to reduce dust and splash risk
- Replacing open handling with sealed or closed cartridges
Starting at the top of the hierarchy reduces reliance on behaviour and training, making safety more consistent across shifts and teams.
2. Engineering Controls to Prevent Splashes and Spills
Engineering controls are designed to physically prevent exposure by isolating people from the chemical hazard. When implemented correctly, they are one of the most reliable ways to reduce risk.
Common controls and splash prevention include:
- Enclosure or closed transfer systems to prevent splashes during movement or dosing
- Ventilation where vapours, mists or aerosols may be generated
- Segregation of chemical processes from walkways or other work areas
- Spill capture and containment, such as bunding or sumps
- Secure, compatible couplings and connectors
- Metered dosing pumps instead of manual pouring
- Anti-siphon devices to prevent backflow
- Drip trays or secondary containment under connection points
These measures reduce the likelihood and the scale of exposure if something goes wrong.
3. Administrative Controls: Safe Work, Permits, Supervision and Training
Administrative controls focus on how work is carried out. While they sit lower in the hierarchy, they are essential for managing residual risk, particularly for non-routine or maintenance tasks.
Effective administrative controls include:
- Clear safe systems of work
- Permit-to-work processes for higher-risk activities
- Adequate supervision, especially for infrequent tasks
- Training so workers understand risks and controls
- Clearly defined emergency procedures
A simple SOP structure for chemical tasks might look like this:
- Required PPE and equipment
- Step-by-step task instructions
- ‘Do not mix’ or incompatibility list
- Shutdown and isolation actions
- Emergency actions in the event of a spill or splash
Well-designed procedures support consistent behaviour and faster, safer responses during unexpected events.
4. PPE as the Last Line (and How to Make it Reliable)
Personal protective equipment (PPE) is the last line of defence in the hierarchy of controls. It does not prevent a spill or splash, but it can reduce contact when other controls fail, only if it is correctly selected and used.
Key considerations for PPE in chemical tasks:
- Ensure material compatibility (e.g. correct glove type for the chemical)
- Confirm proper fit to avoid gaps or exposure
- Train staff on correct donning, doffing and limitations
Because PPE depends heavily on human behaviour, it should never be the primary control, but it remains an important backup when higher-level controls are in place.
Emergency Readiness: How to Avoid Chemical Hazards Becoming Serious Incidents
Even with strong preventative controls in place, chemical hazards can never be completely eliminated. Emergency readiness is what stops a spill or splash from escalating into a serious incident. Clear procedures, trained staff and reliable emergency equipment ensure the response is fast, calm and effective when it matters most.
Spill and Splash Response: The First 60 Seconds
The actions taken in the first minute after a chemical spill or splash can make a difference. Everyone working with chemicals should understand the immediate priorities:
- Raise the alarm and alert others in the area
- Isolate the source of the spill if it is safe to do so
- Follow site emergency procedures without delay
- Get help quickly, including first aiders or trained responders
Speed and clarity are essential. Confusion or hesitation can increase exposure and worsen the outcome.
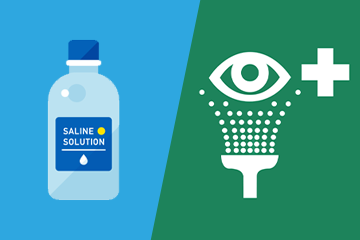
Emergency Safety Showers: Reducing Severity After a Splash
Emergency safety showers are for emergencies only and are designed to protect people following accidental chemical contact. Their purpose is to flush hazardous substances from the skin quickly, helping to reduce the severity of chemical burns after a spill or splash.
ANSI Z358.1 references the need for extended flushing, commonly cited as 15 minutes, to ensure thorough decontamination. To support this, standards also specify the use of tepid water – water that is neither too hot nor too cold.
Tepid water is important because it:
- Encourages users to remain under the shower for the full flushing duration
- Reduces the risk of shock or discomfort that could cause early abandonment
- Supports effective washing away of hazardous substances
Emergency safety showers should never be viewed as a substitute for prevention, but as an essential safeguard when prevention fails.
Placement and Accessibility Expectations
Emergency equipment must be reachable and usable immediately. Guidance commonly referenced in standards includes:
- Emergency safety showers located within approximately 10 seconds’ travel from the hazard
- A clear, unobstructed route with no locked doors or trip hazards
- Highly visible locations with appropriate signage and lighting
If access is delayed, the effectiveness of decontamination is reduced.
A practical way to check readiness is to carry out a simple walk-time test:
- Start from the hazard area and walk at a normal pace to the nearest safety shower
- Confirm it can be reached within the expected time
- Check visibility, signage and lighting along the route
- Consider environmental factors such as cold weather, PPE restrictions or reduced visibility
This real-world check often highlights issues that aren’t obvious on drawings or layouts.
Selecting the Right Emergency Safety Shower for Your Site
Not all emergency safety showers are suitable for every chemical environment. To effectively deal with chemical hazards in the workplace, emergency equipment must be selected based on the specific substances present, the environmental conditions on site, and the practical realities of how the equipment will be used.
Choosing the correct specification ensures that the shower performs as intended in an emergency, delivering effective decontamination without introducing additional risks.
- Temperature Requirements for Specific Chemicals
Both EN 15154 and ANSI Z358.1 require safety showers to deliver tepid water. This supports the recommended extended flushing duration, helping ensure that users remain under the water long enough for effective decontamination.
However, in some environments, maintaining tepid water isn’t straightforward. Sites exposed to extreme cold, high ambient heat or fluctuating supply temperatures may require:
Additionally, certain chemicals, such as ammonia-based substances, may require carefully controlled water temperatures during decontamination. In these cases, a standard plumbed shower may not be sufficient, and a purpose-designed, temperature-controlled solution is required.
- Material Compatibility and Corrosive Environments
Chemical compatibility doesn’t only apply to PPE and storage. Some chemicals can react with certain pipework materials over time, leading to internal corrosion, erosion or component failure. If materials aren’t compatible with the hazards present on site, performance may degrade without obvious warning.
In corrosive or aggressive industrial environments, more robust construction materials may be required. Stainless steel pipework, corrosion-resistant coatings or specialist components can help ensure long-term reliability and consistent emergency performance.
Specifying the correct materials at the outset helps protect the equipment and the people who rely on it.
- Environmental and Site-Specific Considerations
Beyond chemical compatibility, emergency safety showers must also be suitable for their physical environment.
Factors to consider include:
- Outdoor vs indoor installation
- Exposure to freezing conditions
- High ambient temperatures
- Remote or unmanned locations
- Hazardous or classified areas
For example, outdoor installations in cold climates may require insulated or heated systems to prevent freezing, while high-temperature environments may require enhanced cooling or shading solutions to maintain compliant water temperatures.
Inspection, Testing and Training
Emergency equipment is only effective if it works when it’s needed. Standards place strong emphasis on regular inspection, testing and training to ensure reliability.
Good practice includes:
- Routine activation and visual checks
- Clear logbooks recording inspections, tests and maintenance actions
- Prompt repair or replacement if issues are identified
Training is equally important. Workers should know:
- Where emergency safety showers are located
- How to activate them immediately
- What to do during and after flushing
Short, practical drills, carried out periodically, help reinforce correct behaviour without disrupting operations.
Conclusion
Preventing chemical hazards in the workplace is most effective when it’s treated as a connected system, not a series of isolated actions. That system starts with knowing which chemicals are on site and how they’re used, assessing the real risks created by everyday tasks, and applying controls in line with the hierarchy – starting with elimination and substitution wherever possible. Just as importantly, those controls must be kept maintained, reviewed and supported by clear procedures so they remain effective.
When this approach is applied consistently, the benefits are clear: fewer chemical incidents, better control of day-to-day risk and reduced injury severity when a splash or spill does occur. A structured system also creates greater consistency across the site, so everyone understands the risks and the correct response in an emergency.
As a final step, it’s worth reviewing your emergency decontamination readiness. Check that emergency safety showers are correctly positioned, immediately accessible, easy to activate and properly maintained in line with recognised standards such as EN 15154 and ANSI Z358.1.
To ensure your site is fully prepared for immediate decontamination in the event of a spill or splash of a hazardous chemical, explore the range of Hughes products and provide essential protection when every second counts.